OneEntry: User-Friendly Content Management for Everyone
Beginner's Guide to OneEntry


Introduction
The world is evolving fast, and tech is even faster, so are the requirements of Developers.
For a long time, We have been using Traditional content management systems (CMS) to build our Websites. But as our requirement for more flexibility and customization increases, Traditional CMS can't stand up to the mark!
That's where Headless CMS comes into the Picture! It provides users with numerous innovative features and greater flexibility with which we can build more customized systems according to our preferences.
There are lots of HeadlessCMS out there, but the one that caught my eye is OneEntry.
In this Article We'll be discussing about OneEntry, a state-of-the-art headless CMS solution, and How it simplifies the management and works with content effectively.
So, Without Delaying Further, Let's START!
What is a Headless Content Management System (CMS)?
Before we dive deep let's understand about Headless CMS.
A content management system (CMS) is a pivotal tool for content publishers such as developers and digital marketers, as it underpins much of the work involved in creating, managing, and optimizing digital content.
A headless CMS is a content management system (CMS) that separates the front-end presentation layer from the back-end content repository.
According to a recent survey by Forrester, 42% of enterprises are planning to adopt a headless CMS within the next 12 months. From this data you can understand Headless CMS is going to dominate the market.
What is OneEntry?

So, what exactly is OneEntry?
In simple words, it's a user-friendly CMS that Simplifies content creation for both technical and non technical person.
With this Platform, Adding text, images and videos are as simple as if you're writing your journal in a notebook.And the Drag-and-drop functionality makes it easier for us to build stunning pages without thinking much about the Code,So we can focus on what truly matters – the Content We want to share...
But OneEntry is not just like any other "user-friendly CMS", It's more than that! It's it's secure, adaptable, as well as multilingual.
The best part?
You control it all through your "Personal Account."
Also another Key feature of OneEntry is it's Ever Growing approach. In the world of content management, things never stay the same, so as our Content Stretergy. To fulfill the demand of Developers and Content creators, OneEntry Keeps improving by adding new features, and functionalities that will ease our work.
Why OneEntry?
Here Comes the Most Important Question! Why should we use OneEntry?
Well, there are many reasons to Do so, Let's take a closer look at each one:
1. User-Friendly Interface:
OneEntry's standout feature is its intuitive interface. With this simple interface, Content creators don't have to deal with confusing menus and tricky functions. Instead, they can focus more on the heart of the matter – creating "real content."
Regardless of ourTechnical knowledge, OneEntry provides us a platform to share what we love to do – Share our experience and express ourselves.
2. Security at the Forefront:
Data security is a real problem in today's world. We, Content creators, don't want our personal data to e breached. OneEntry understands this problem.And to solve this problem, it provides a security framework with many advanced features like mTLS certificates and optional token-based authentication settings.
With these amazing security features, it keeps our content safe. Also The Automatic backup feature provides an additional layer of protection, with which there's no chance of data loss.
Flexibility is key, Different creators have different preferences. OneEntry gives us the flexbility to configure these security settings directly from our "Personal Account". So, We can choose our security measures according to our preferences.
3. Multilingual Technical Support for a Global Audience:
In the World on Globalisation, Every content creators wants their content to be read by the audience around the world. OneEntry takes care of that as well, It provides multilingual technical support.
It allows creators to easily manage and present their content in various languages so that it's accessible to a wide range of audience.
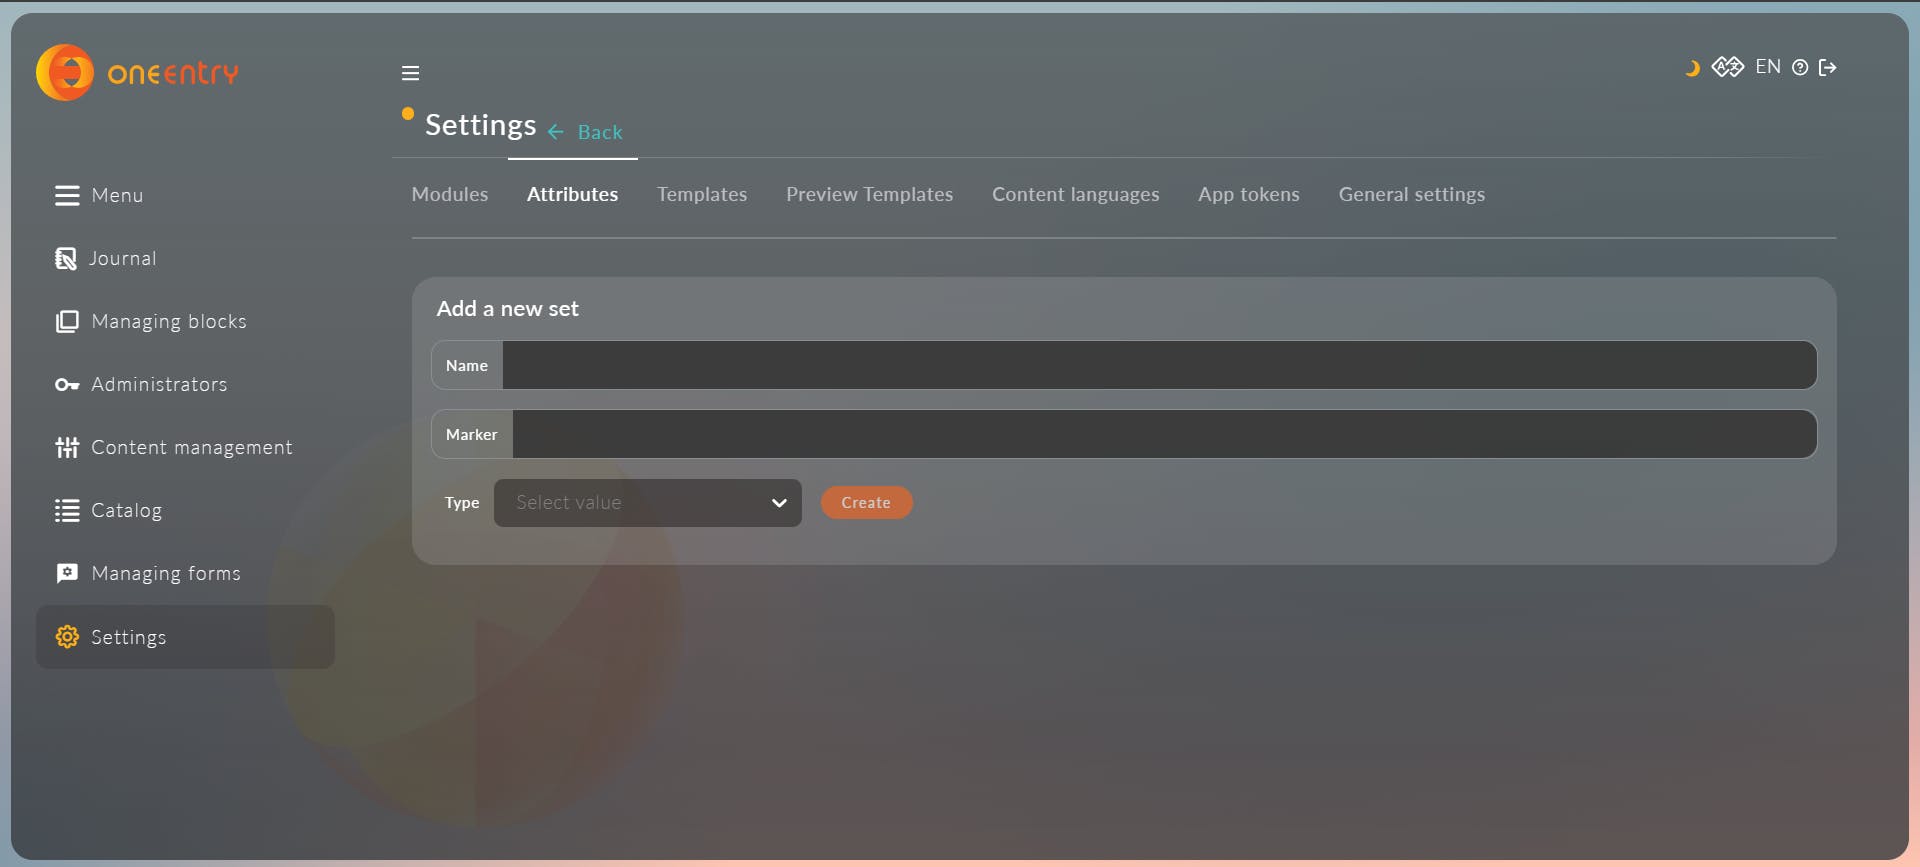
4. Attribute-Based System:
OneEntry's attribute-based system is a game-changer for content creators of all levels. It Helps to manage complex content projects with ease.
The best part is we need any prior technical knowledge to manage all these. All we have to do is to add the name of the attributes , And the rest, OneEntry will work on it's backend. It makes it easier for content creators from the non technical backgrounds.
5. Support for Typescript Devs:
OneEntry Reduces the work of Typescript devs as well. With this, we don't have to manually define the types for our data. It Provides a fully typed data handling out of the box from the NPM package.
6. Multilingual Content Storage:
Language is No more a Barrier.
OneEntry's multilingual content storage empowers Content creators to create content on their own language. It helps us store and manage content in multiple languages.

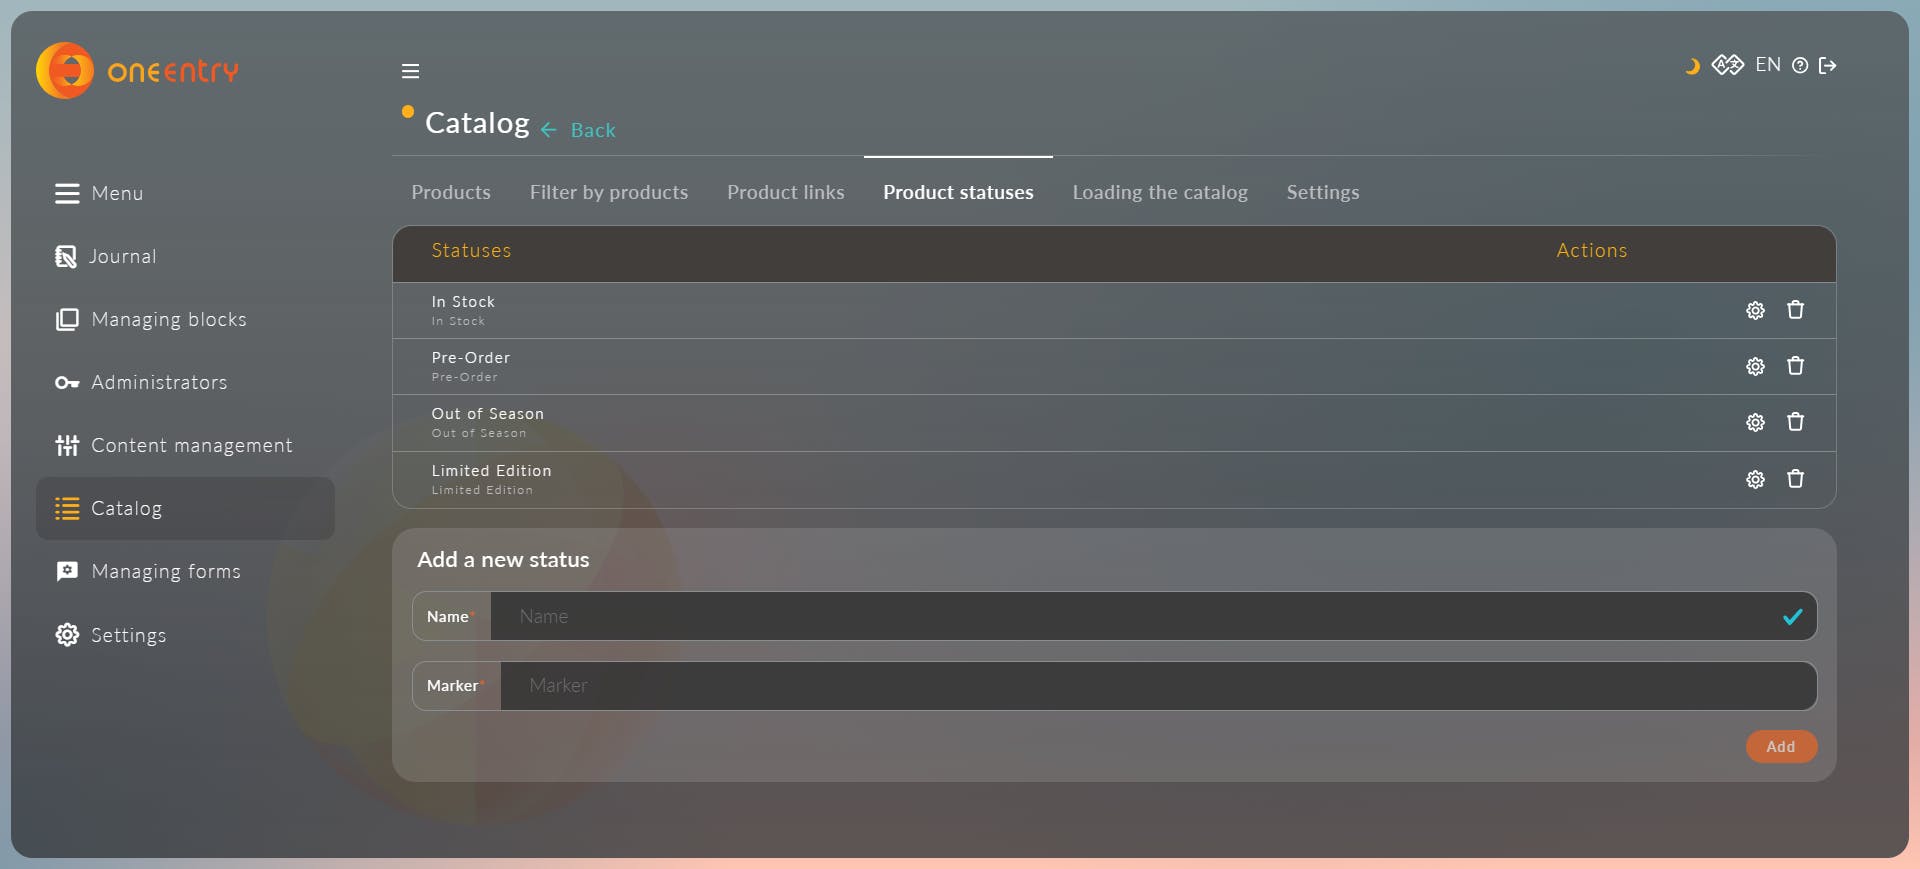
7. Product Statuses:
Efficient product management is key to success. OneEntry's robust product status system helps us to manage the product efficiently. With OneEntry we can Define and configure our own product statuses to perfectly align with your workflow and business needs.
Suppose We are building And Online E commerce store for that few statuses will be "In Stock," "Pre-Order," "Out of Season," or even "Limited Edition,".
8. Product Catalog Relation:
One of my Personal favourite feature of OneEntry is "Product Catalog Relation" feature. With this, We can curate connections between different offerings in our catalog.
Suppose We are building an E commerce store, and the user is searching one Product, We can also share products related to that product and This feature significantly increases the chance that the user will but those items. It is very helpful feature from a business perspective as well because this feature is maximizing the potential for increased sales
Getting started with OneEntryCMS:
Till Here, We know what is OneEntry CMS and Why to use it. Now, Let's Understand Step-by-step how to get started with it and use it in our Javascript .
Step 1: Creating a Free Account on OneEntry
To start things off, We have to create a Free account on OneEntry.
The process is pretty straight forward.Let's Go to oneentry.cloud. Then we'll enter our email address and phone number.
After that, we'll receive an confirmation email with our login credentials for our personal account.

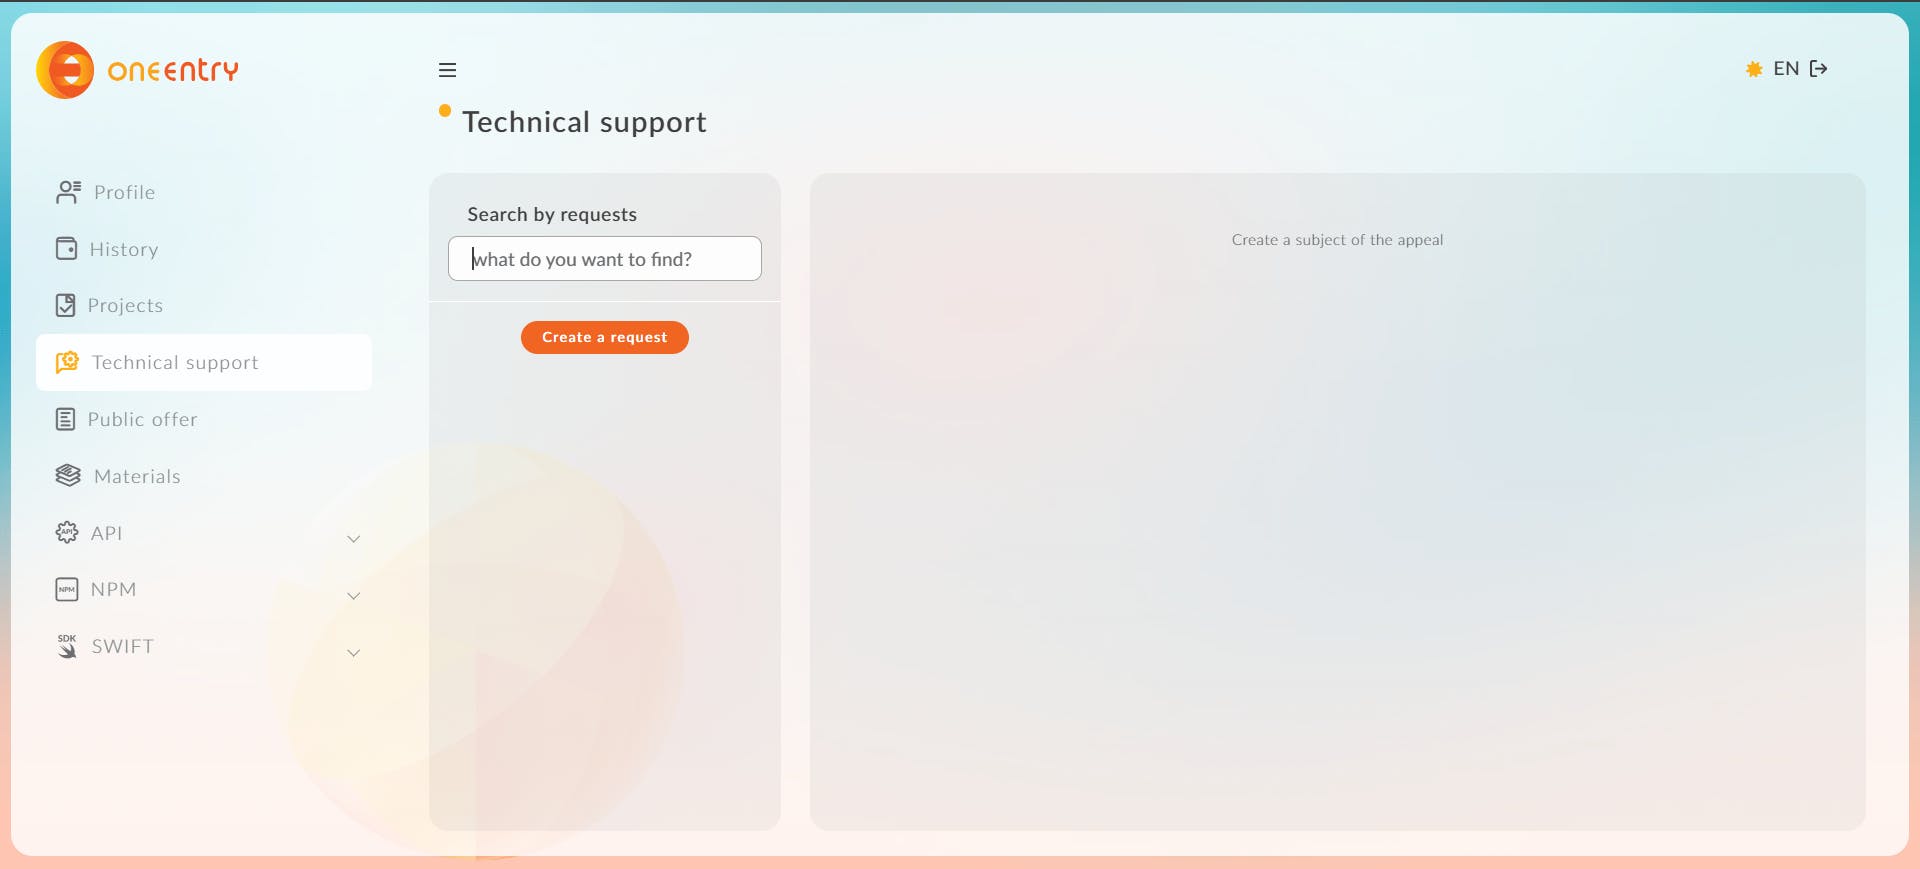
Step 2: Logging In and Accessing the Dashboard:
Now that we have our login details, We'll log in to our account. Then,We'll get a a user-friendly dashboard like this.
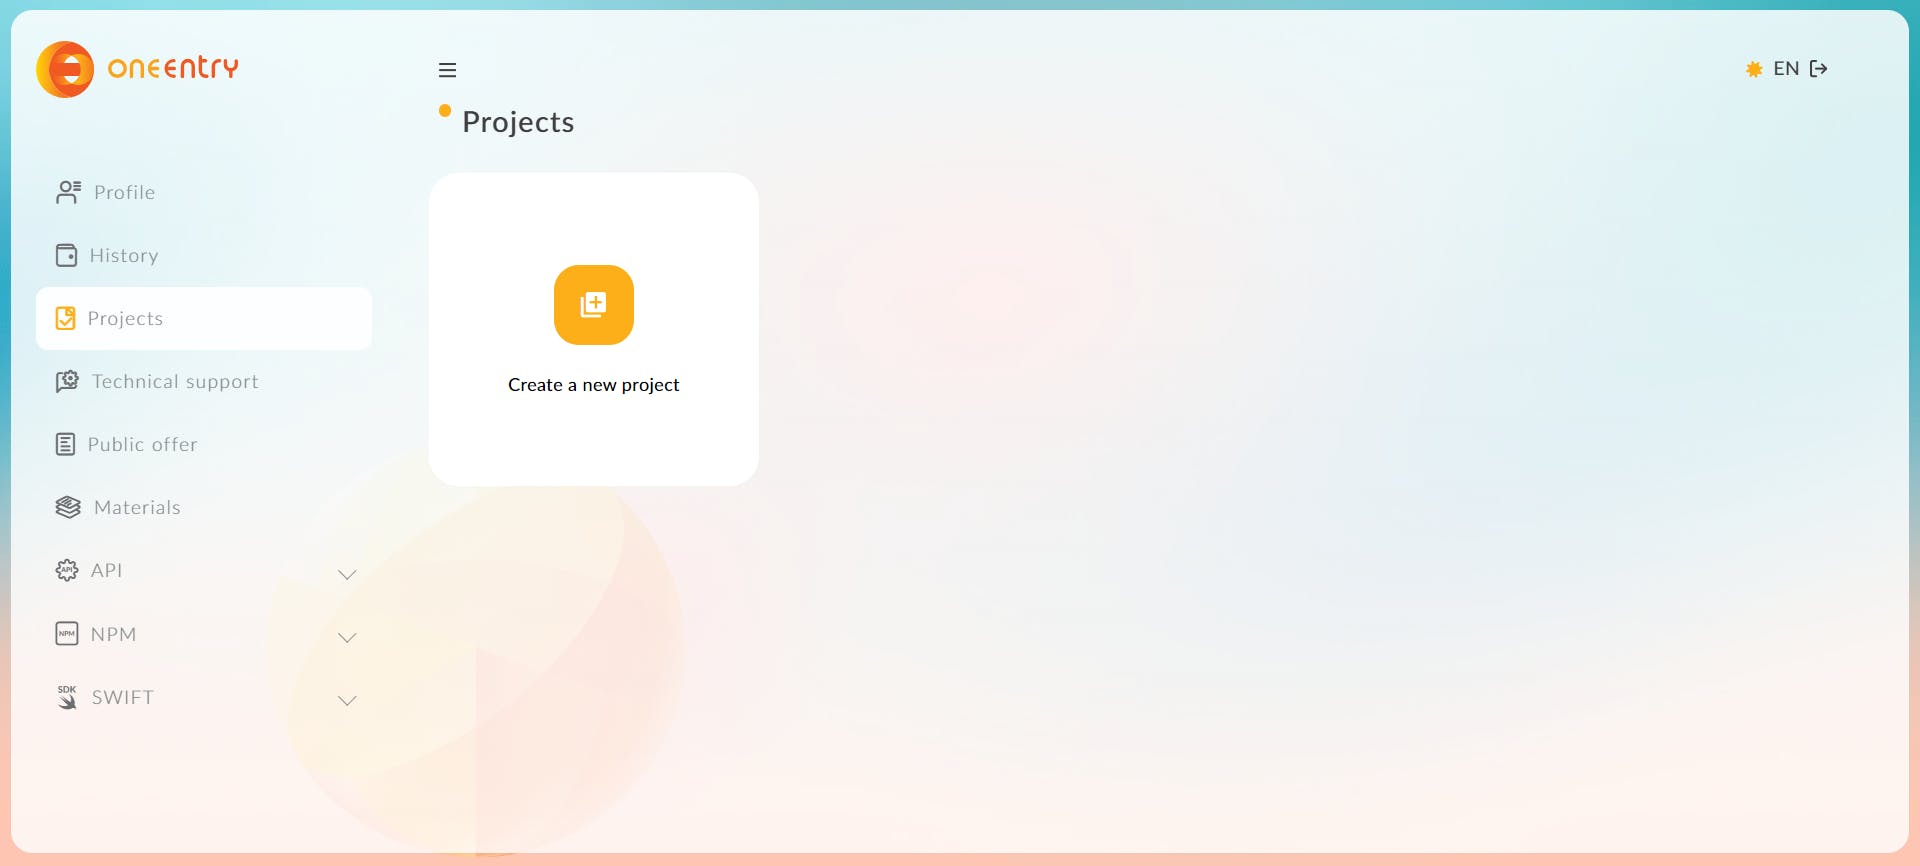
Step 3: Project Creation
In the dashboard, We'll create our Project
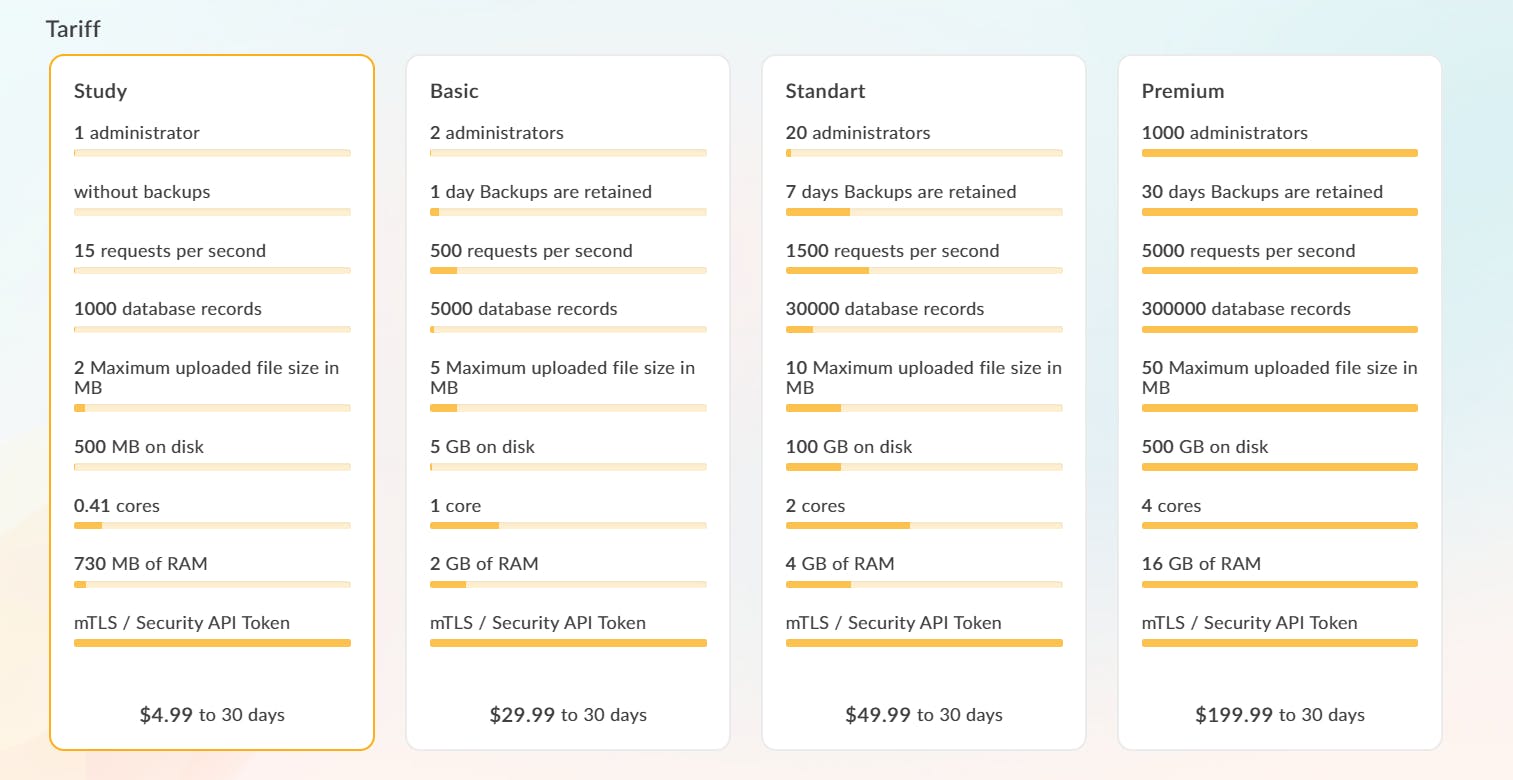
We'll give a name to our project and after that we'll choose a pricing Plan.

OneEntry Has Different Pricing Plans, You can choose according to your Preference.
For this demo, we'll choose the study plan.
After choosing our plan, we'll Click "Create" to set up our project.Shortly after, We'll receive another email with login details specific to this project.
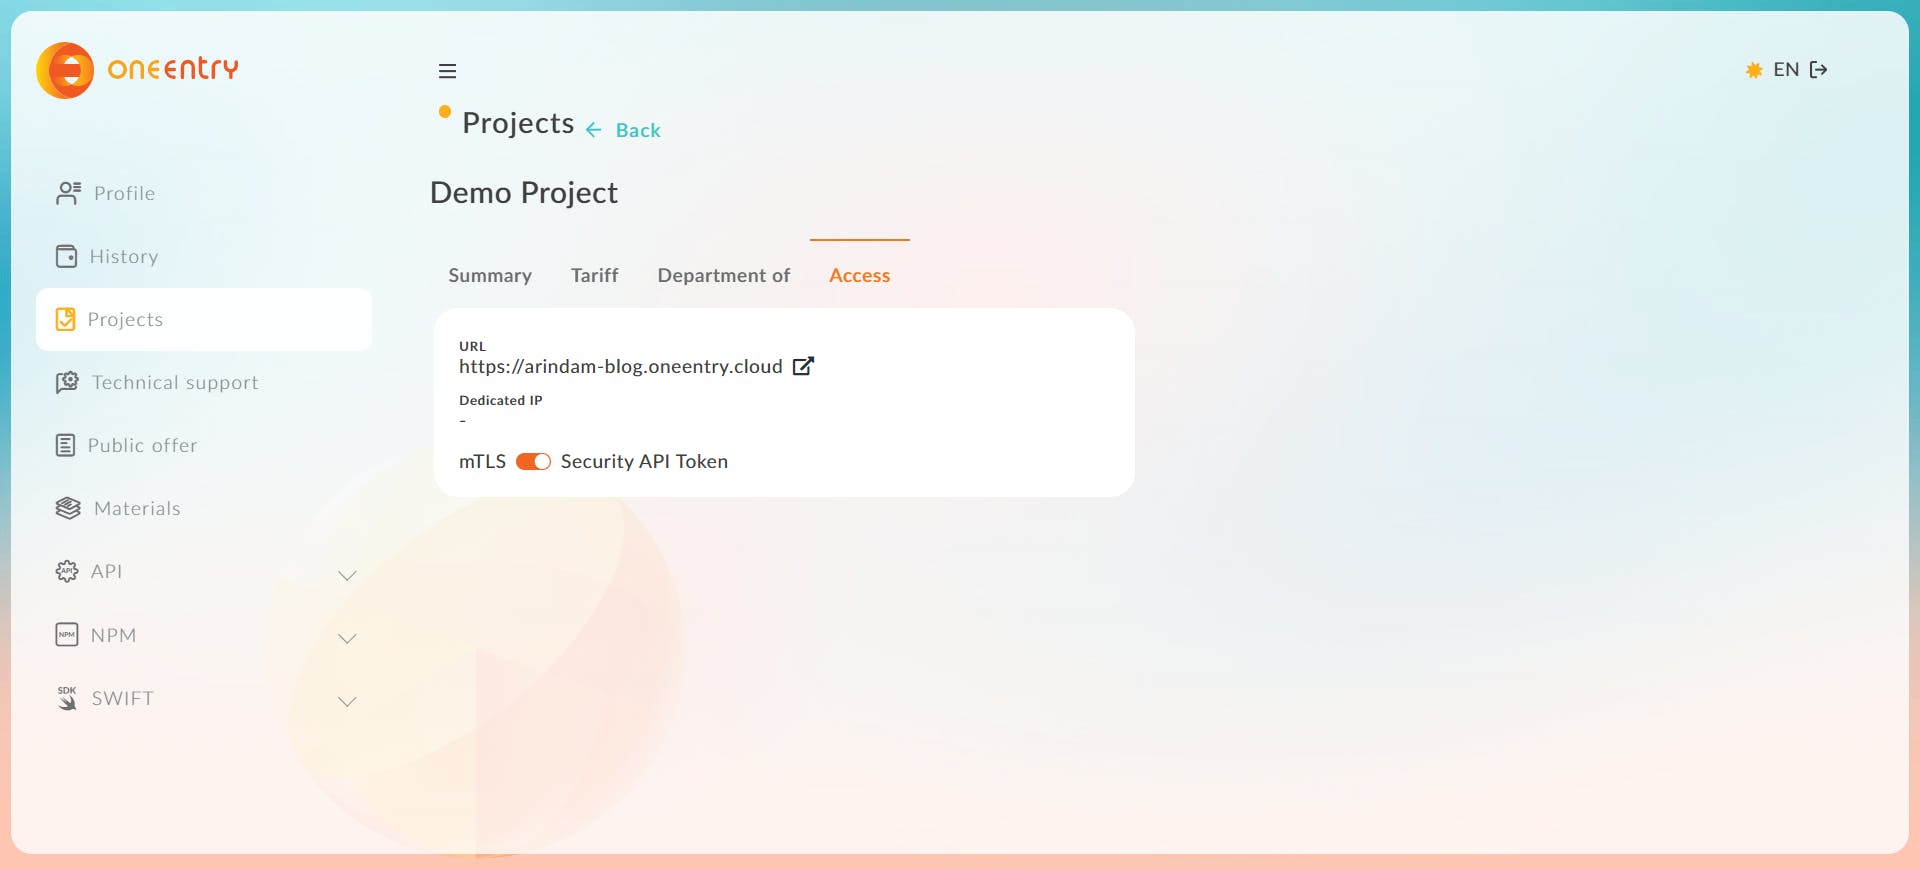
After that,We'll click on the newly created domain page and we'll log in as an administrator.

Step 4: Setting Up Our JavaScript Application Together
Now, We'll integrate OneEntryCMS into our JavaScript application. The Steps are pretty straight forward.
First, We'll go to the settings and create an access token. We'll connect OneEntry to our Javascript App using this access token.

We'll save the token as an environment variable so that we can use this in our application.
Step 5: Install OneEntry's NPM Package
Now,We'll Install OneEntry’s NPM package inside our project.
For that, Run the following command:
npm install oneentry
Now We have installed oneentry package. Next, We'll store the access token in the .env folder. Here's and example .env.local folder.
Replace those placeholder links and tokes with your access tokens.

Step 6: Integrate OneEntry into Your Application
After this, It's pretty straight forward, We'll import import defineOneEntry module from the package we installed before.
And that's it,We can access to all the methods that it has out-of-the-box.
import { defineOneEntry } from "oneentry";

const url = process.env.NEXT_PUBLIC_CMS_URL;
const token = process.env.NEXT_PUBLIC_CMS_TOKEN;

const api = defineOneEntry({ url, token });

export default function Home() {
  return <main> Arindam-Blog </main>;
}
And there we have it!
We have successfully added OneEntryCMS to our Javascript application. Now you can use this to create your own blog, e commerce website and many other applications.
For more resources feel free to check this.
Learning Resources:
Hope, You got an basic Idea of What is OneEntry and How to get started with it. Now, If you want to learn more about it, check out their YouTube Channel—it's filled with helpful tutorials that make understanding and using OneEntry.
Here's the Link:
Conclusion
If you found this blog post helpful, please consider sharing it with others who might benefit. You can also follow me for more content on Javascript, React, and other web Development topics.
For Paid collaboration mail me at : arindammajumder2020@gmail.com
Connect with me on Twitter, LinkedIn, Youtube and GitHub.
Thank you for Reading :)