Authenticate Your React App with Firebase
Step-by-Step guide to User Authentication with Firebase
Introduction
Authentication is a feature that most apps need. Firebase is the most popular service provider for user authentication. In this article, we'll see how to perform user authentication with Firebase SDK.
So, Let's Start!

Project Setup:
In this section, we'll install Firebase and complete the setup for our project.
- At first, let's go to the Firebase Console. You'll find this interface:
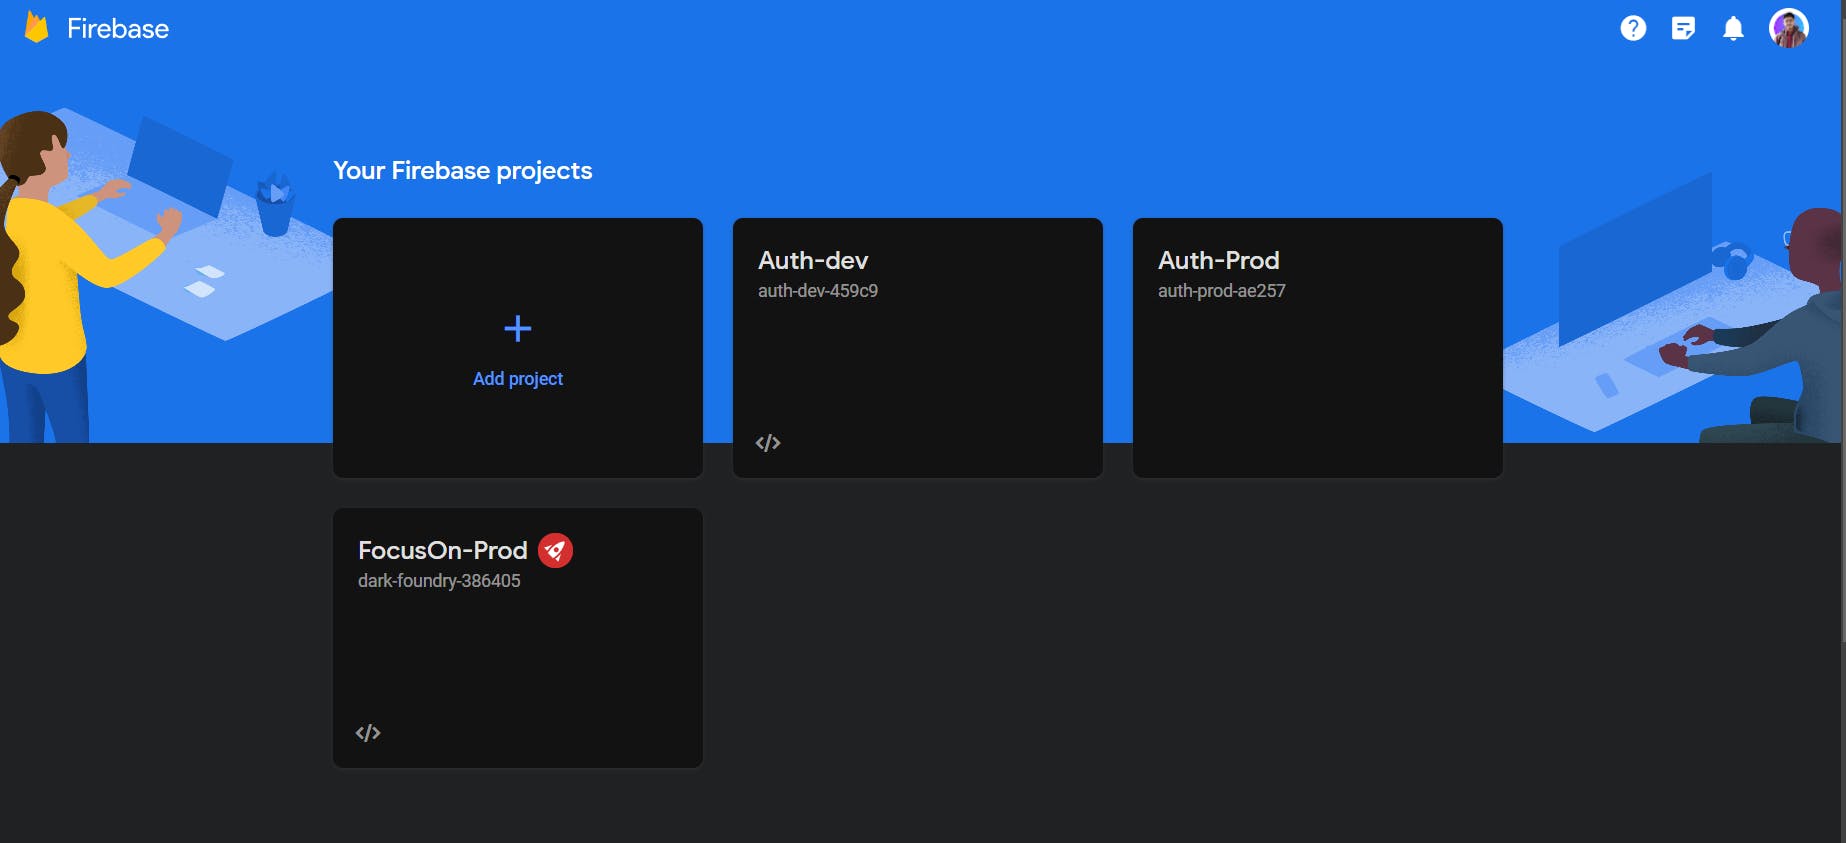
Don't worry if your interface is empty, These are some previous projects of mine.
Now Go to
Add Project. Here we'll get a three-step process. In this case, we'll name our project "Demo-project". In the next steps, we'll enable Google Analytics and complete the process.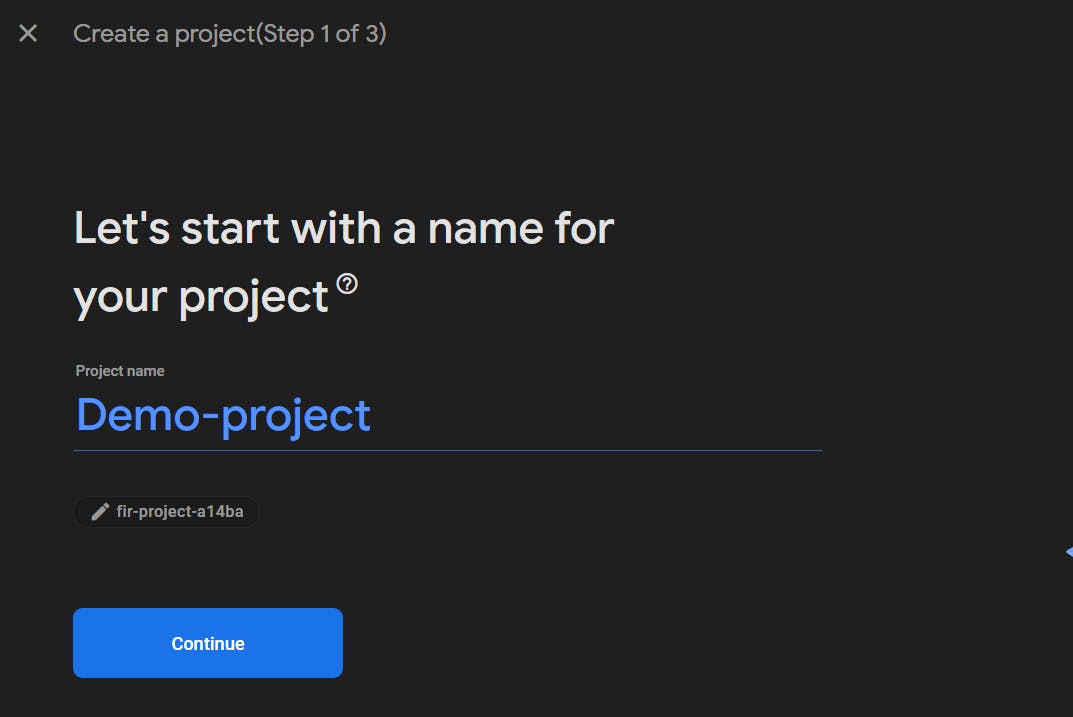
Now, Firebase will start creating our Project.
After creating our project, We'll create our Firebase App.
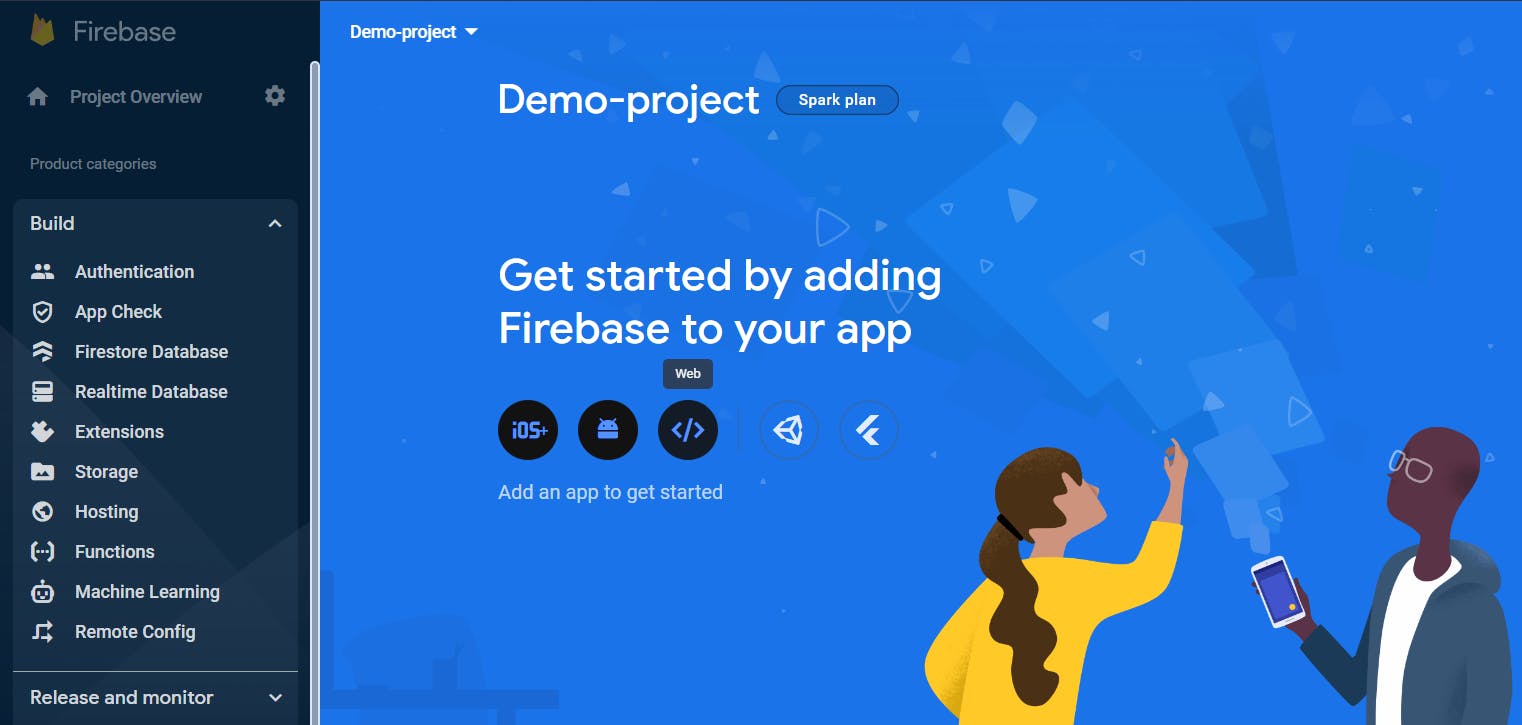
Then We'll get the Firebase config file. We'll copy that code and use that in the later sections.
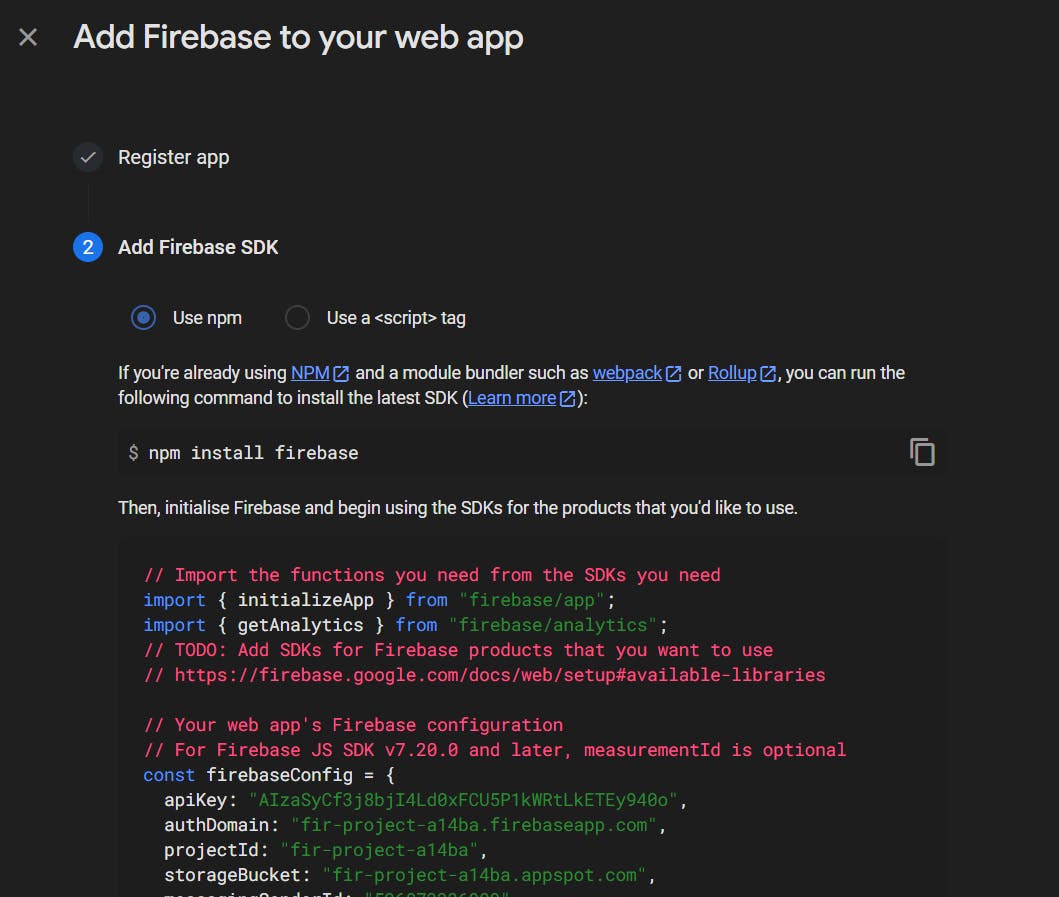
Before using the Config file, We need to Install Firebase on our project.
To install Firebase use the following code:
 npm install firebase // if you are using npm
 yarn add firebase // if you are using yarn

 // optionally you can install the firebase-cli
 npm i firebase-tools
 yarn add firebase-tools
To confirm that you have successfully installed Firebase in your project, GO to
Package.jsonfile, It'll look like this :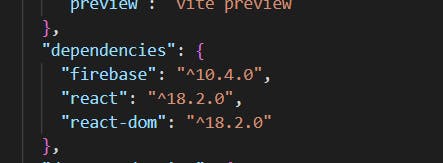 💡You can also install
firebase-toolsglobally according to your use case.Congratulations, We have successfully set up our Firebase Console. Our next screen will be the Firebase console dashboard.
Setting Up Firebase Authentication:
In the previous section, we have set up our Firebase Console. In this section, we'll initialize Firebase in our project.
On the first hand, We'll create our React App using Vite. Then We'll create src/config/firebase.js file and add the Config file That we got in the last section.
// src/config/firebase.js
import { initializeApp } from "firebase/app";
import { getAnalytics } from "firebase/analytics";

const firebaseConfig = {
  apiKey: "AIzaSyCf3j8bjI4Ld0xFCU5P1kWRtLkETEy940o",
  authDomain: "fir-project-a14ba.firebaseapp.com",
  projectId: "fir-project-a14ba",
  storageBucket: "fir-project-a14ba.appspot.com",
  messagingSenderId: "526873336909",
  appId: "1:526873336909:web:25ceda068b2ad7b16b9004",
  measurementId: "G-7KZ587NQCM"
};

const app = initializeApp(firebaseConfig);
const analytics = getAnalytics(app);
Now, We have successfully initialized Firebase in our project.
To Start using Firebase SDK we need to export the products we'd like to use. So now the code will look like:
// src/config/firebase.js
import { initializeApp } from "firebase/app";
import { getAnalytics } from "firebase/analytics";
// Import the 'getAuth' function from Firebase Authentication.
import { getAuth } from "firebase/auth";

const firebaseConfig = {
  apiKey: "AIzaSyCf3j8bjI4Ld0xFCU5P1kWRtLkETEy940o",
  authDomain: "fir-project-a14ba.firebaseapp.com",
  projectId: "fir-project-a14ba",
  storageBucket: "fir-project-a14ba.appspot.com",
  messagingSenderId: "526873336909",
  appId: "1:526873336909:web:25ceda068b2ad7b16b9004",
  measurementId: "G-7KZ587NQCM",
};

const app = initializeApp(firebaseConfig);
export const analytics = getAnalytics(app);
// Initialize Firebase Authentication and get a reference to the service
export const auth = getAuth(app);
Authenticate Your React App:
Signing-in Users:
Let's go to the Firebase console and then Authentication.
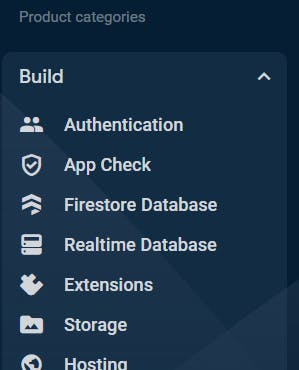
Then You'll get one interface like this:
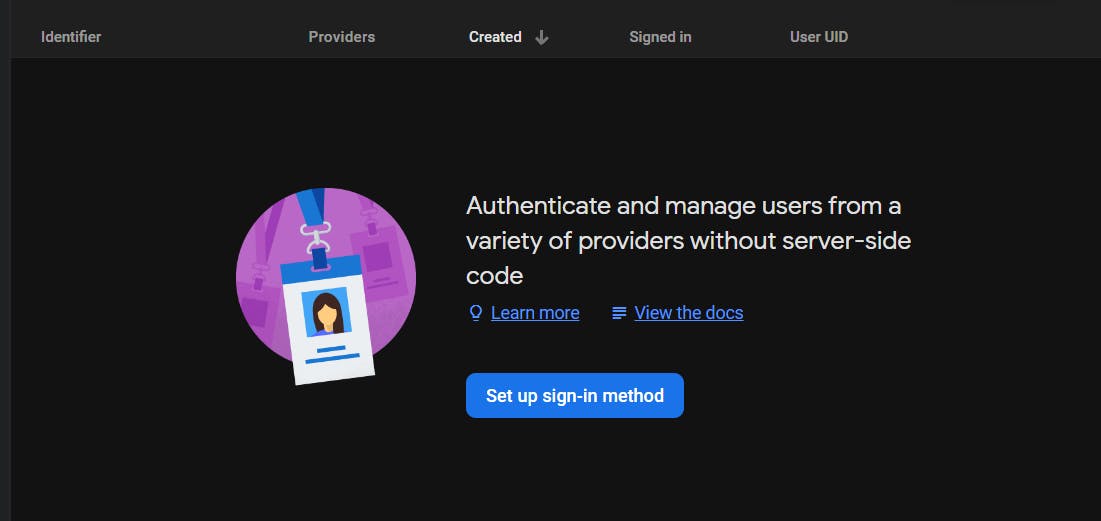
It's the place where the User Data will be stored. Now, We'll set up our sign-in Methods!
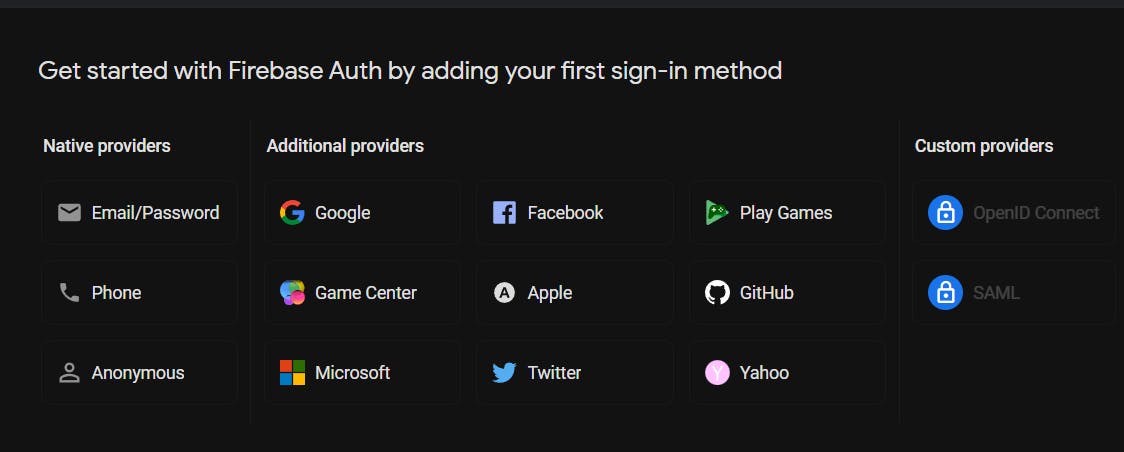
Firebase Authentication allows users to sign in to your app using different sign-in methods. But for this example, we'll be working with Email-Passwords & Google Auth.
Now, We'll create our Main Component (I'm naming it as auth.js ).In this component, we'll be using createUserWithEmailAndPassword method from Firebase to create a new user.
Here's the Source Code of the Component:
import { auth } from "../config/firebase.js";
import { useState } from "react";
import { createUserWithEmailAndPassword } from "firebase/auth";

export const Auth = () => {
  const [email, setEmail] = useState("");
  const [password, setPassword] = useState("");
// This function handles user sign-up using Firebase authentication.
  const handleSignUp = async () => {
    try {
    // We await the createUserWithEmailAndPassword function from the 'auth' object,
    // which is assumed to be initialized elsewhere in the code. This function
    // is used to create a new user account with the provided email and password.
      await createUserWithEmailAndPassword(auth, email, password);
    } catch (err) {
      console.error(err);
    }
  };
  return (
    <>
      <div>
        <h1>Sign Up</h1>
        <input
          type="text"
          placeholder="email"
          onChange={(e) => setEmail(e.target.value)}
        />
        <input
          type="password"
          placeholder="password"
          onChange={(e) => setPassword(e.target.value)}
        />
        <button onClick={handleSignUp}>Sign Up</button>
      </div>
    </>
  );
};
Okay! So We have created Our Sign-in Component. Now, We have to check if it's working or not! To check that We'll log the user's email.
console.log(auth.currentUser.email); // Might Throw errors.
console.log(auth?.currentUser?.email); //handles potential null or undefined values
At first, I signed in with a Demo email "arindam@gmail.com" and a password. Let's check the Firebase console now:

Amazing! It's Working! Now let's check the console if it's showing the mail or not!

Congrats! We have successfully implemented the Sign-in component.
Great Going!
Signing in With Google:
Now, we'll implement another famous way of signing in users that's through Google!
Let's go to the Firebase console again and enable the Google auth option.
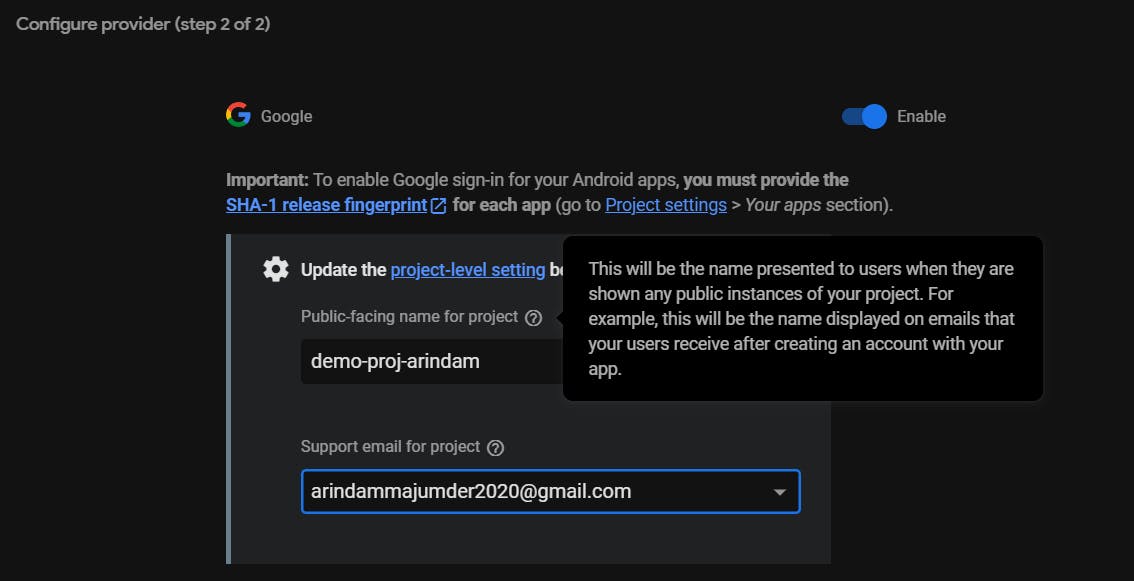
Next, we'll update the firebase.js file. We have to import GoogleAuthProvider from Firebase to perform Google auth. After updating the code will look like this:
// src/config/firebase.js

import { initializeApp } from "firebase/app";
import { getAnalytics } from "firebase/analytics";
// Import the GoogleAuthProvider class from the Firebase Authentication module.
import { getAuth, GoogleAuthProvider } from "firebase/auth";

const firebaseConfig = {
  ... // Add your API-keys
};

const app = initializeApp(firebaseConfig);
export const analytics = getAnalytics(app);
export const auth = getAuth(app);
// Create a GoogleAuthProvider instance to enable Google authentication.
export const googleProvider = new GoogleAuthProvider();
Next, we'll add the necessary Singin with Google function in the auth.jsx file.
// src/Components/Auth.jsx

import { useState } from "react";
import { auth, googleProvider } from "../config/firebase";
import { createUserWithEmailAndPassword, signInWithPopup } from "firebase/auth";

export const Auth = () => {
  const [email, setEmail] = useState("");
  const [password, setPassword] = useState("");
  console.log(auth?.currentUser?.email);
  const handleSignUp = async () => {
    try {
      await createUserWithEmailAndPassword(auth, email, password);
    } catch (err) {
      console.error(err);
    }
  };
  const signInWithGoogle = async () => {
    try {
      await signInWithPopup(auth, googleProvider);
    } catch (err) {
      console.error(err);
    }
  };

  return (
    <>
      <div>
        <h1>Sign Up</h1>
        <input
          type="text"
          placeholder="email"
          onChange={(e) => setEmail(e.target.value)}
        />
        <input
          type="password"
          placeholder="password"
          onChange={(e) => setPassword(e.target.value)}
        />
        <button onClick={handleSignUp}>Sign Up</button>
        <button onClick={signInWithGoogle}>Signin with Google</button>
      </div>
    </>
  );
};
Firebase Authentication also provides other sign-in methods, including using GitHub, Microsoft, Apple, or a federated identity provider, such as Facebook Login.
Logging in Users:
Logging in User is almost similar to Sign-in. Instead of calling createUserWithEmailAndPassword , we'll call signInWithEmailAndPassword .
// src/Components/Auth.jsx
import { signInWithEmailAndPassword } from "firebase/auth";

  const handleLogIn = async () => {
    try {
      await signInWithEmailAndPassword(auth, email, password);
    } catch (err) {
      console.error(err);
    }
  };

  // Add this button yo handle login
  // <button onClick={handleLogIn}>Log In</button>
Logging out Users:
It's time to create the log-out function. This is pretty simple, We just need to import the signout method.
// src/Components/Auth.jsx
import { signOut } from "firebase/auth";

const logout = async () => {
    try {
      await signOut(auth);
    } catch (err) {
      console.error(err);
    }
  };
 // Add this button yo handle logout
 // <button onClick={logout}>Log Out</button>
Final Result:
The Final Code will look like this:
// src/Components/Auth.jsx

import { useState } from "react";
import { auth, googleProvider } from "../config/firebase";
import {
  createUserWithEmailAndPassword,
  signInWithPopup,
  signOut,
  signInWithEmailAndPassword,
} from "firebase/auth";

export const Auth = () => {
  const [email, setEmail] = useState("");
  const [password, setPassword] = useState("");
  console.log(auth?.currentUser?.email);
  const handleSignUp = async () => {
    try {
      await createUserWithEmailAndPassword(auth, email, password);
    } catch (err) {
      console.error(err);
    }
  };

  const handleLogIn = async () => {
    try {
      await signInWithEmailAndPassword(auth, email, password);
    } catch (err) {
      console.error(err);
    }
  };

  const signInWithGoogle = async () => {
    try {
      await signInWithPopup(auth, googleProvider);
    } catch (err) {
      console.error(err);
    }
  };
  const logout = async () => {
    try {
      await signOut(auth);
    } catch (err) {
      console.error(err);
    }
  };

  return (
    <>
      <div>
        <h1>Sign Up</h1>
        <input
          type="text"
          placeholder="email"
          onChange={(e) => setEmail(e.target.value)}
        />
        <input
          type="password"
          placeholder="password"
          onChange={(e) => setPassword(e.target.value)}
        />
        <button onClick={handleSignUp}>Sign Up</button>
        <button onClick={handleLogIn}>Log In</button>
        <button onClick={logout}>Log Out</button>
        <button onClick={signInWithGoogle}>Sign in with Google</button>
      </div>
    </>
  );
};
Conclusion:
If you found this blog post helpful, please consider sharing it with others who might benefit. You can also follow me for more content on Javascript, React, and other web Development topics.
For Paid collaboration mail me at : arindammajumder2020@gmail.com
Connect with me on Twitter, LinkedIn, Youtube and GitHub.
Thank you for Reading :)

